
A Step-by-Step Guide to Replacing Broken Garage Door Cables
- COMMERCIAL GARAGE DOOR REPAIR
- GARAGE DOOR OPENER INSTALLATION
- GARAGE DOOR SPRING REPAIR
- SAME-DAY GARAGE DOOR REPAIR
- CUSTOM GARAGE DOOR
- GARAGE DOOR OPENER REPAIR
- GARAGE DOOR TRACK REPAIR
- GARAGE DOOR CABLE REPAIR
- GARAGE DOOR PANEL REPAIR
- LOCAL GARAGE DOOR REPAIR
- GARAGE DOOR REPLACEMENT
- NOISY GARAGE DOOR FIX
- GARAGE DOOR INSTALLATION
- GARAGE DOOR SECTION REPLACEMENT
- OVERHEAD GARAGE DOOR REPAIR
- GATE REPAIR
A Step-by-Step Guide to Replacing Broken Garage Door Cables
When it comes to ensuring the proper functionality of your garage door, the cables play a vital role. However, damaged or broken garage door cables can throw everything off track—literally. If you’re looking to tackle a garage door cable repair, this guide walks you through the process step by step. Before you proceed, remember that working with garage doors can be dangerous due to the tension in the springs. If you’re unsure, it’s always best to call a professional.
Why Are Garage Door Cables Important?
Garage door cables are key components of your door’s functionality. They work alongside the springs to lift and balance the weight of the door, ensuring smooth and controlled movements. When these cables break or fray, it can disrupt the door’s operation and even pose safety hazards.
Attempting a garage door cable repair yourself can save time and money, but it’s crucial to prioritize safety and follow the steps carefully.
Tools You’ll Need for the Job
Before you start, make sure you have the following tools and equipment ready:
- Ladder
- Replacement garage door cables
- Locking pliers
- Wrenches
- Safety gloves and goggles
Now that you’re prepared, let’s get started.
Step 1: Ensure Safety First
The first and most important step is to disconnect the garage door opener from its power source. Pull the manual release cord to allow you to move the door freely by hand. You’ll also need to clamp the door in place using locking pliers to secure it and prevent it from slipping while you work.
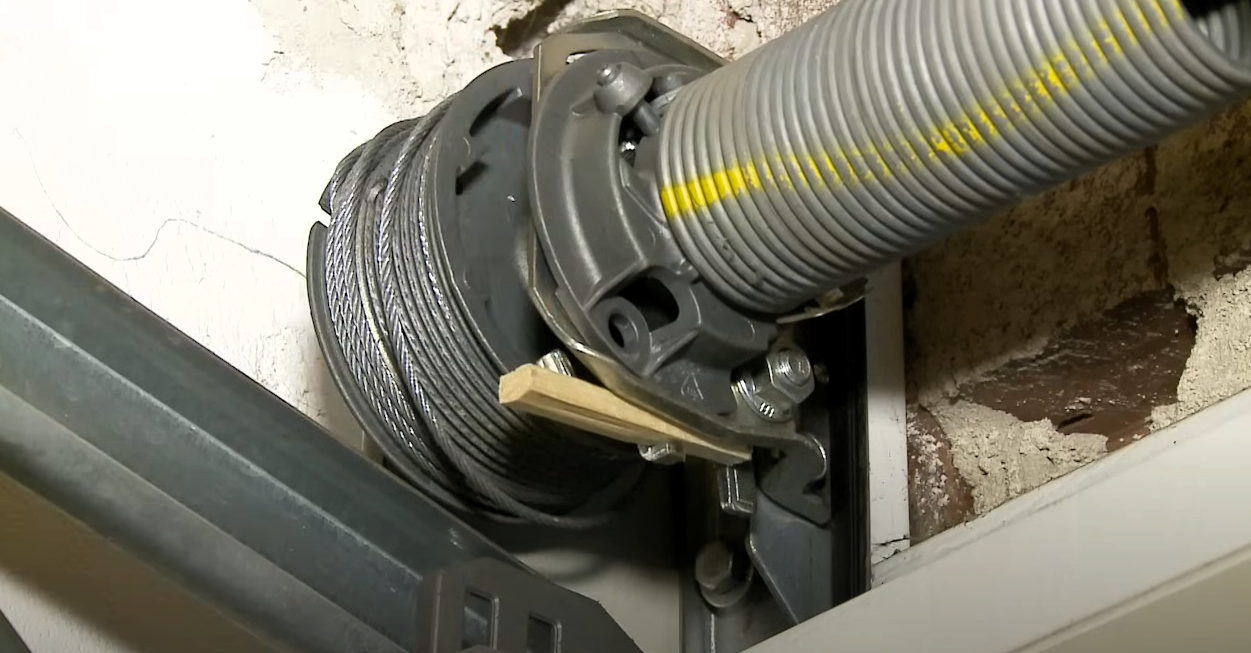
Step 2: Remove the Old Cable
Climb the ladder to access the broken cable. Start by unwinding it from the bottom bracket and drum. Pay close attention to how it was attached, as you’ll need to use the same positioning for the new cable. Once removed, inspect the cable for wear or kinks to confirm its condition.
Step 3: Install the New Cable
Attach the replacement cable to the bottom bracket first. Then, thread it upward along the cable path and wrap it around the cable drum. Tighten the drum carefully, ensuring there are no slack segments in the cable.
Step 4: Adjust and Test
Once the new cable is installed, check the cable tension and alignments. Reconnect the garage door opener and test the door’s operation to ensure everything runs smoothly. The door should move up and down without jerking or catching.
Why Consider Professional Help
While this guide provides a general overview, it’s worth noting that garage door repairs can involve risks, especially with high-tension springs. If you’re hesitant or don’t feel confident handling the repair, hiring a professional is the safest route.
Step 5 (Optional): Routine Maintenance
After replacing the cable, take a moment to inspect other parts of your garage door system for wear and tear—such as the springs, rollers, and tracks. Proper maintenance can save you from future costly repairs.
Trust the Experts at Bradenton FL Garage Door Repair
If a DIY approach feels overwhelming or if you’d rather leave your garage door cable repair in expert hands, look no further than Bradenton FL Garage Door Repair. Our skilled technicians ensure safe and reliable repairs, bringing your garage door back to perfect functionality. Reach out to us today for fast, professional service!